- Joined
- Jun 12, 2014
- Messages
- 744
- Reaction score
- 21
- Points
- 81
magandang hapon po mga ka ant ")
para po sa mga nag tatanong kung pano gumawa ng shell or mag lagay ng apps sa shell sa isang thread ko na ito ----> Reformating Tools by stigmatized
naisipan kong ipost ang simple tutorial na ito para naman maibahagi ko ang aking natutunan sa isang post din sa ibang forum ni boss Xeven2nd na alam ko naman po na marami sa atin ang naka gamit na ng shell nya
umpisahan na po natin
SHELL making - Sample and Guides Tutorial here
Good day mga boss. alam ko po marami ng tutorial here dito about making shell using AutoPlay Media Studio
pero mag-shashare din ako para kahit papano ay makatulong din ako sa inyo ng konti para sa mga mahihilig gumawa ng shell
at para din sa mag-uumpisa pa lang na gusto din gumawa ng shell like GSM shell.
una download po muna kayo ng software parehong cracked or full version po yan mga boss:
i prefered AutoPlay Media Studio v6.0.4.0 pero may mas bago na po dito ito lang ang nakasanayan ko gamitin.
download here:AutoPlay Media Studio v6.0.4.0
after download install nyo lang po ang software at mag-simula na po tayo.
unahin natin ang basic sa pag-gawa ng shell.
PROCEDURE STEP BY STEP:
SAMPLE 1.
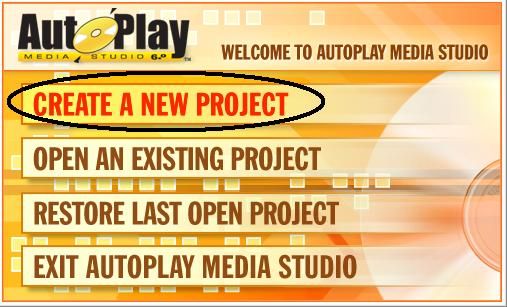
- run AutoPlay Media Studio
and click CREATE A NEW PROJECT
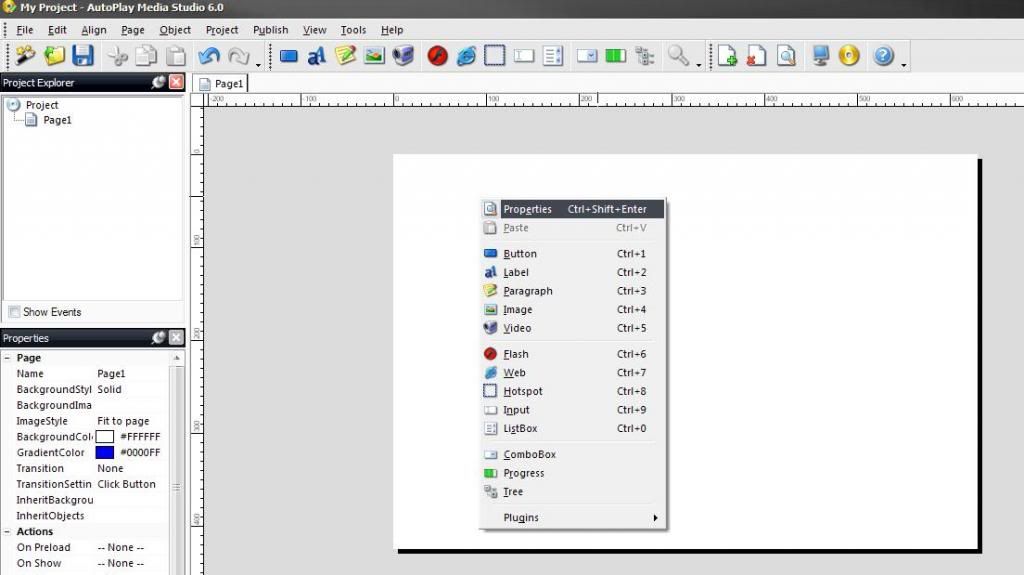
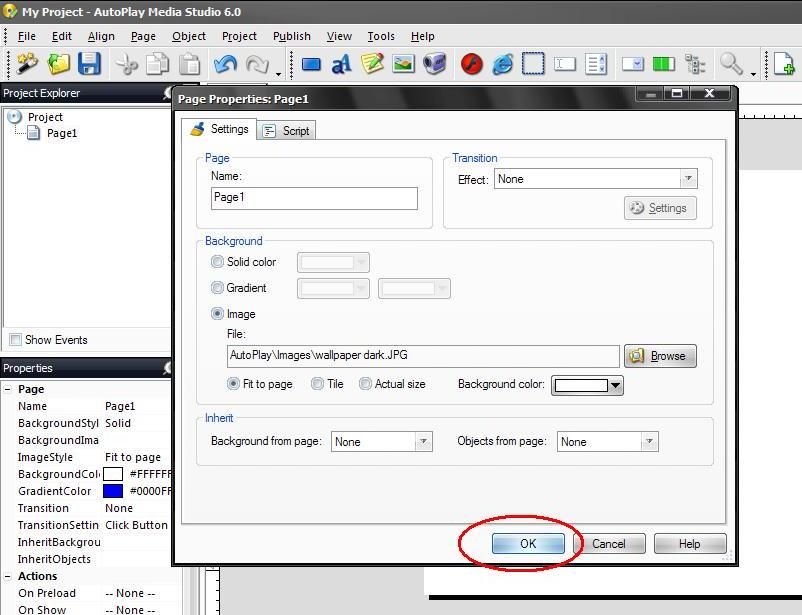
-right click on white background and click PROPERTIES
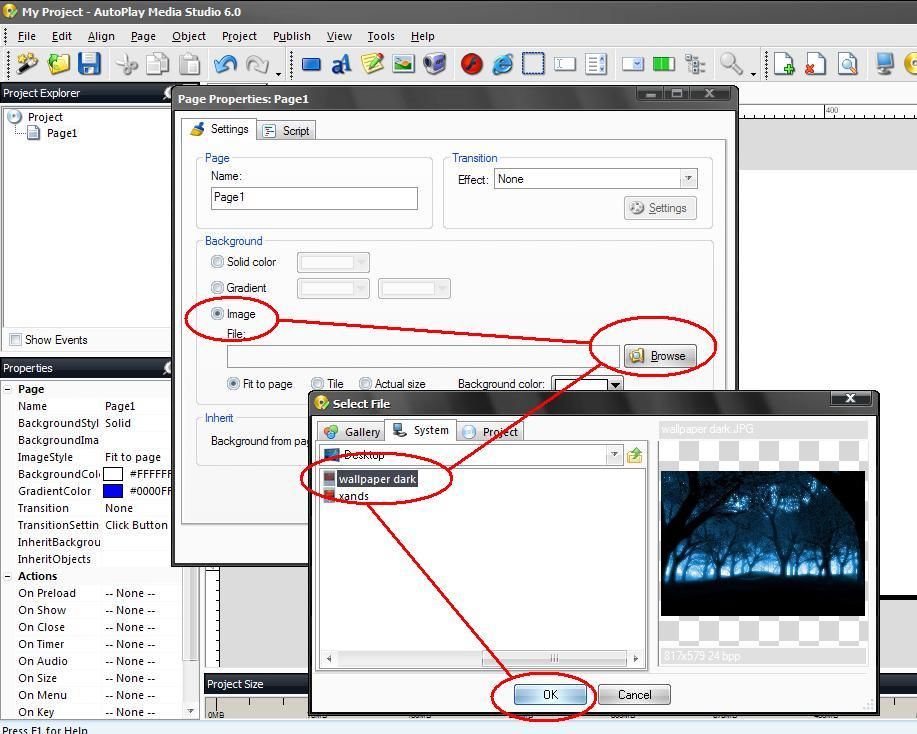
-choose IMAGE
-click BROWSE (browse wallpaper anything you want in your hard drive)
-click OK
click OK
-right click again on your Back ground wallpaper
-click BUTTON
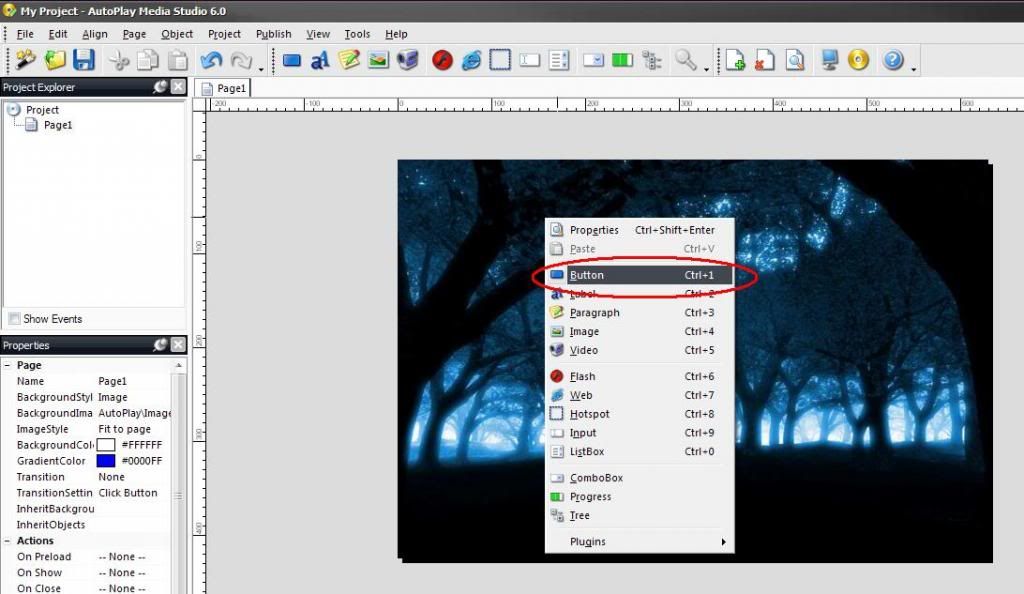
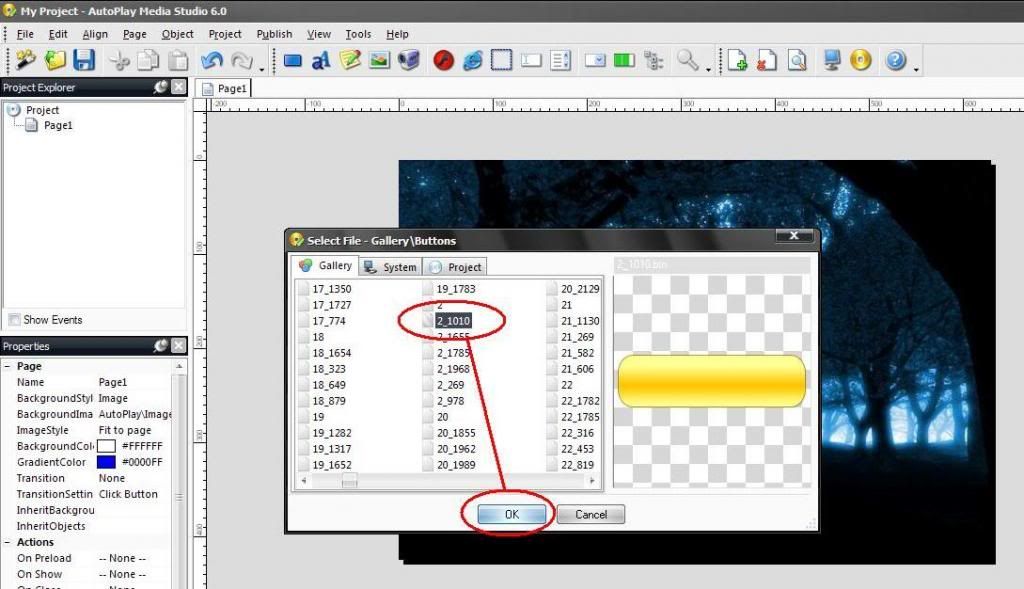
-choose any button design anything you want
-then click OK
- click the on the BUTTON
- choose QUICK ACTION
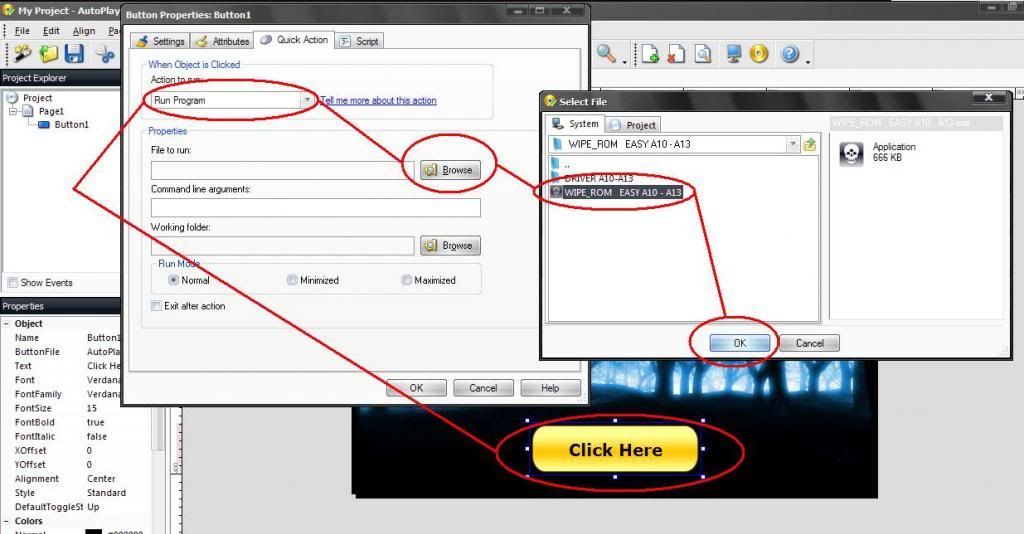
- select RUN PROGRAM
- click BROWSE
- and choose software anything you want browse at your hard drive
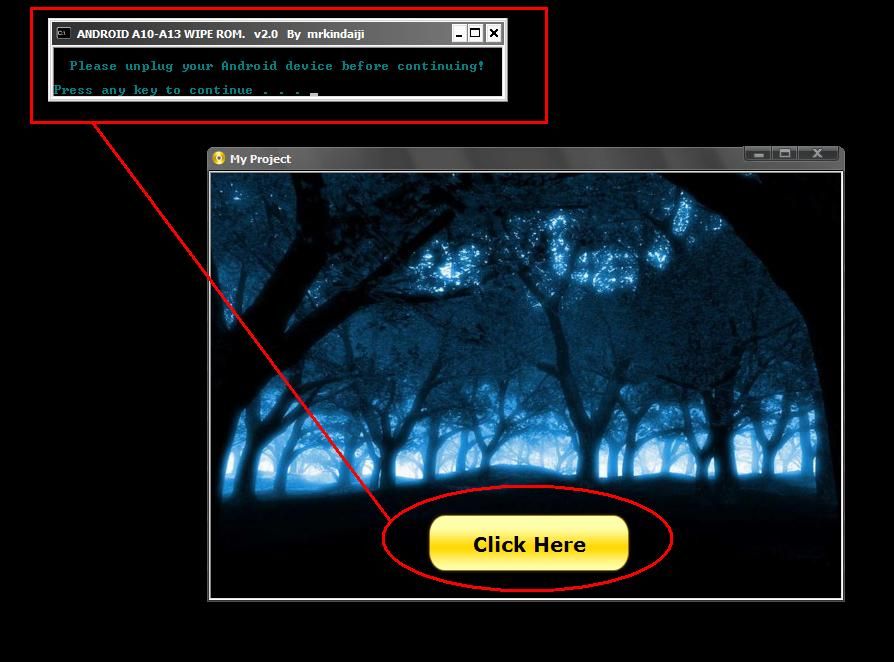
ex: WIPE_ROM_EASY (see in the picture)
- then click OK
- click BROWSE
- click DOCS
- click OK
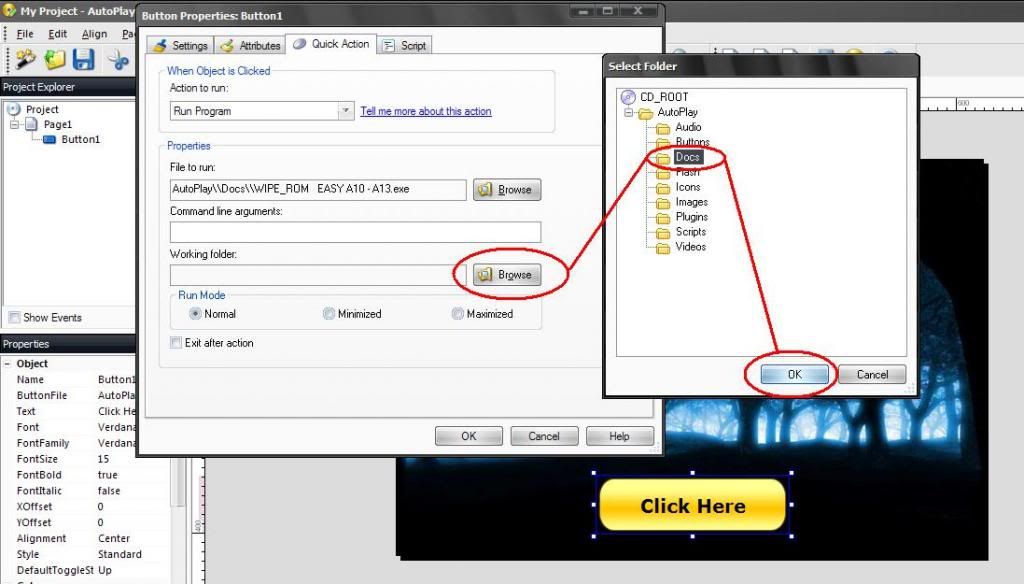
click OK
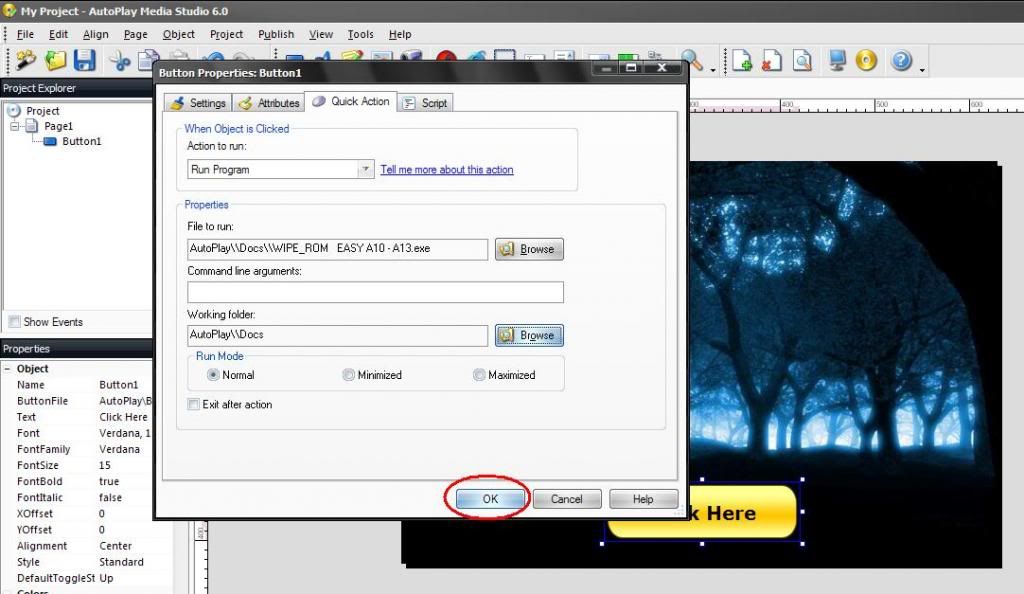
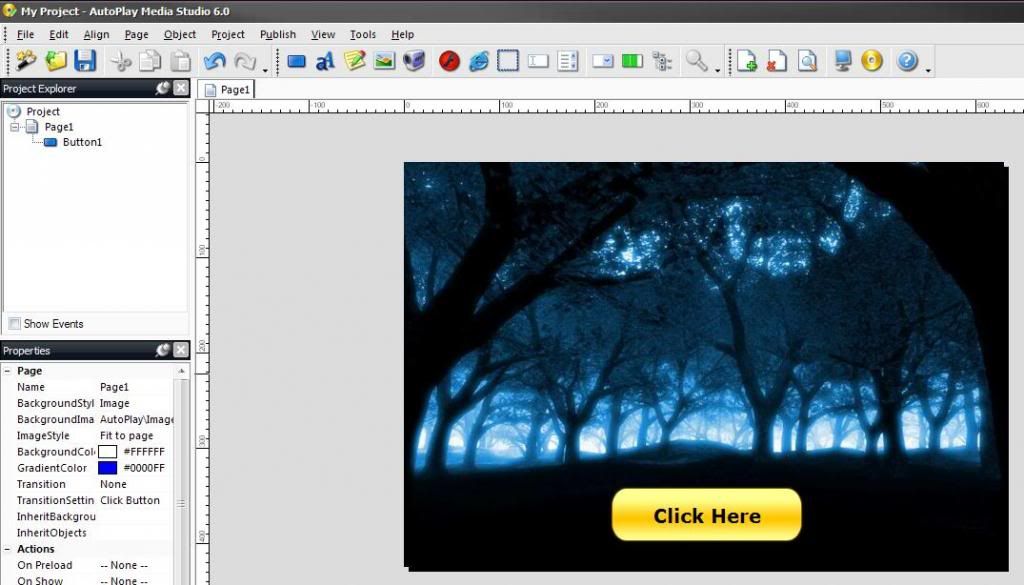
- click PREVIEW to test your project (see in the picture)
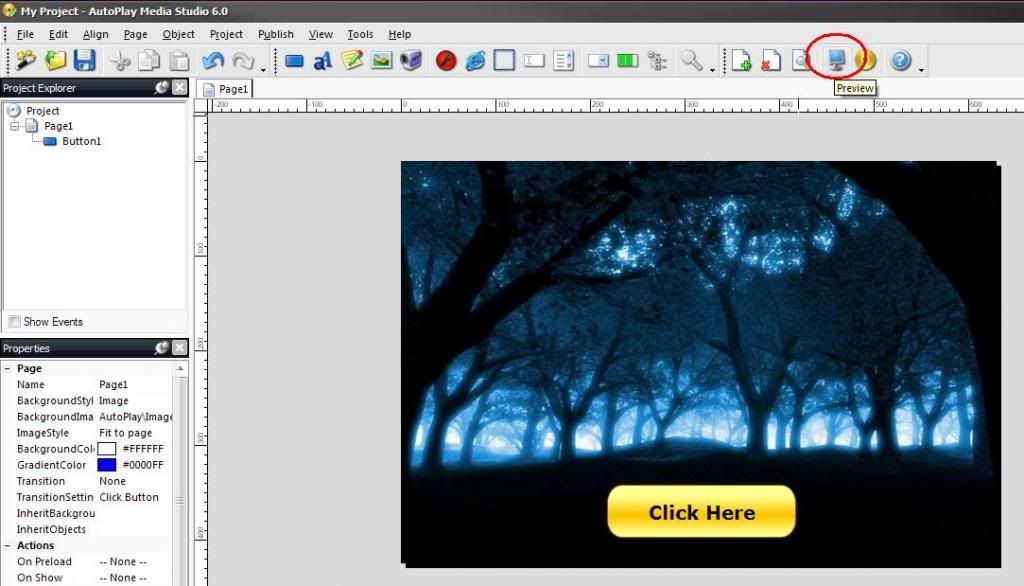
- click (CLICK HERE) to test
NOW LETS SAVE THE PROJECT WE MADE
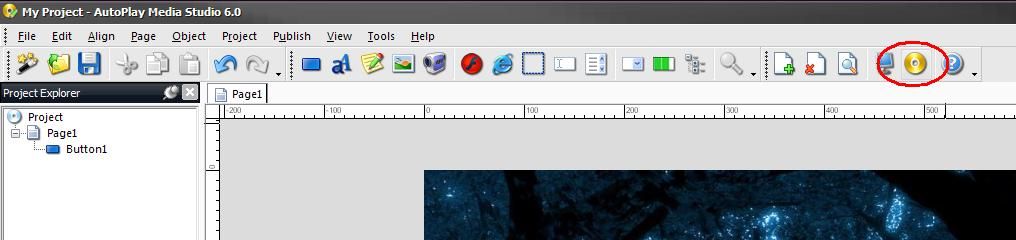
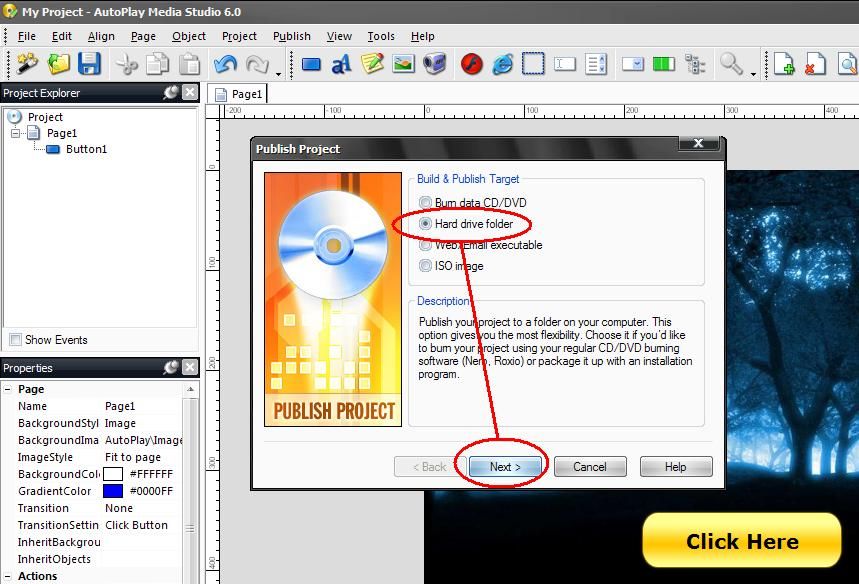
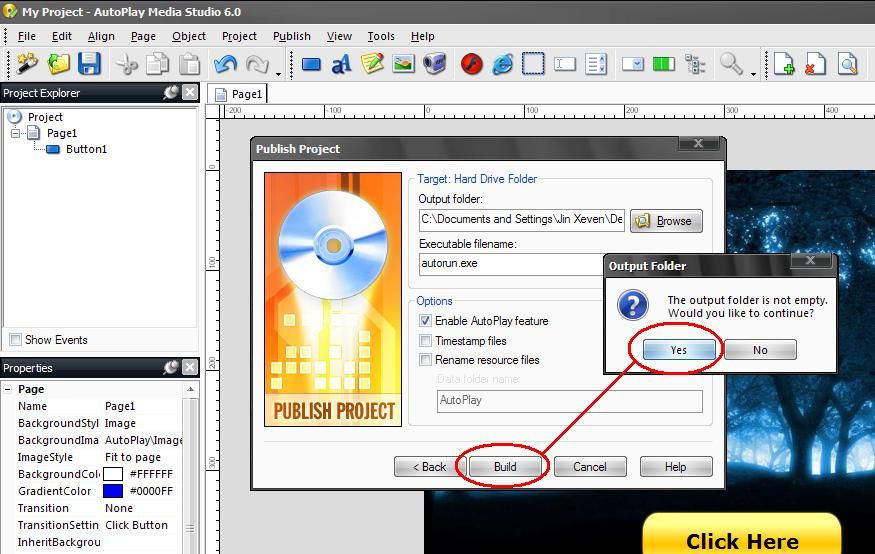
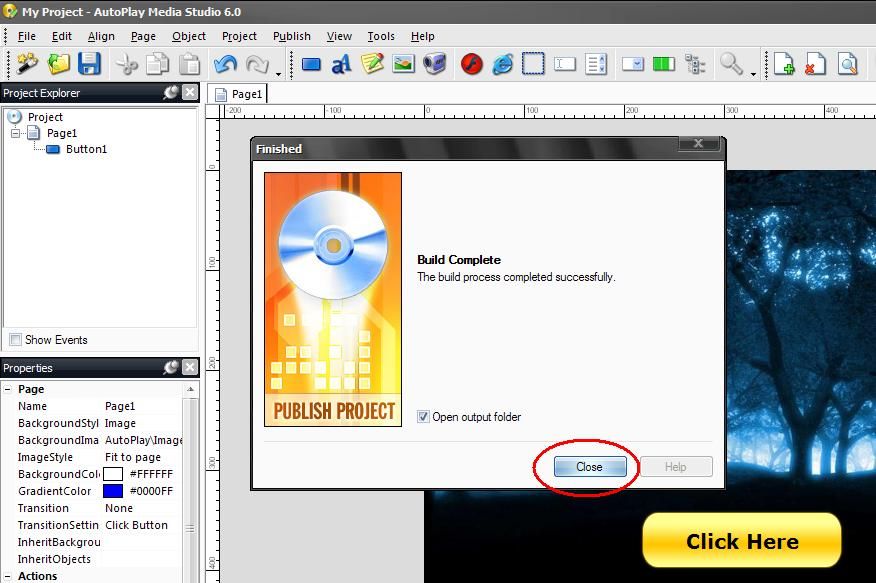
- click BUILD (see in the picture)
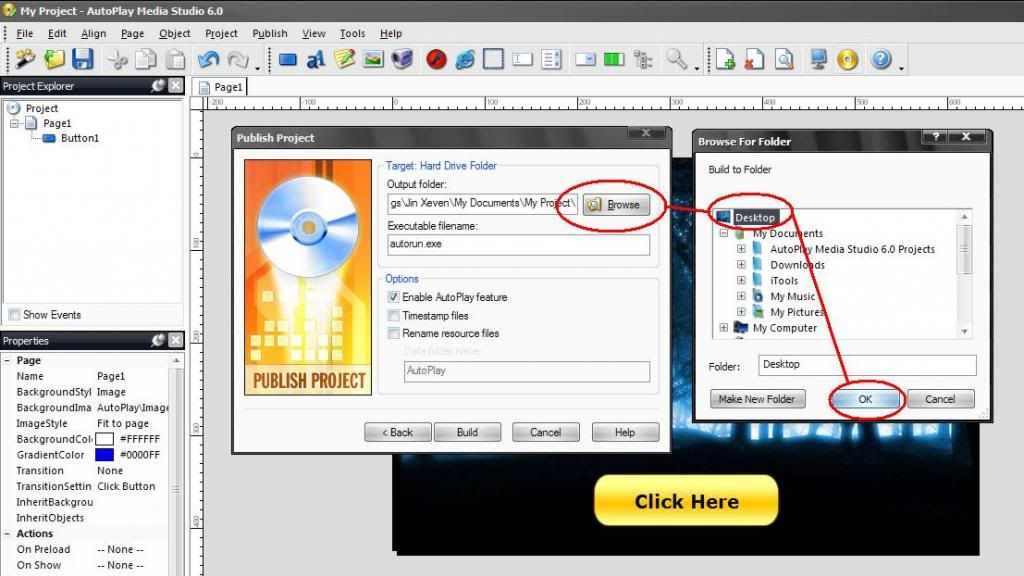
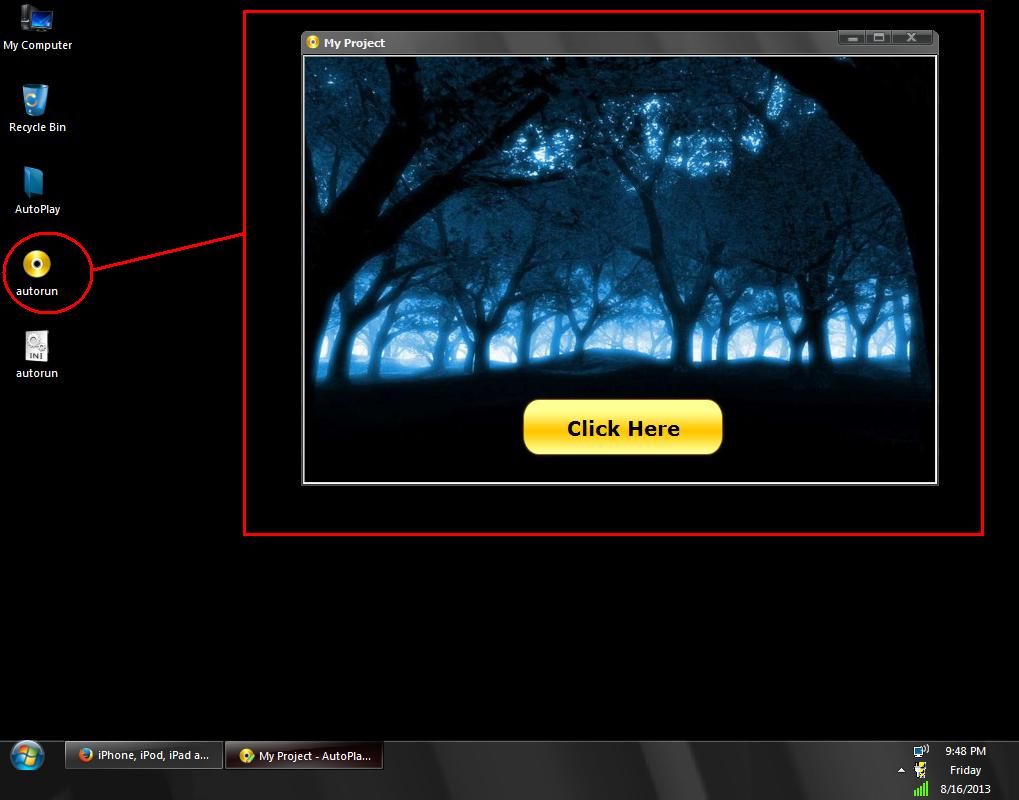
NOW YOU CAN FOUND YOUR PROJECT IN DESKTOP (you can save your project also any where you want)
-FINISH
TO BE CONTINUE FOR OTHER SAMPLES AND GUIDES. . . . . . . . . . . . .
isama ko na din po ang multiloader collection ko para sa mga wala pa po Multiloader Collection in 1 Shell

Credit To The Owner Xands Miranda A.K.A Xeven2nd
para po sa mga nag tatanong kung pano gumawa ng shell or mag lagay ng apps sa shell sa isang thread ko na ito ----> Reformating Tools by stigmatized
naisipan kong ipost ang simple tutorial na ito para naman maibahagi ko ang aking natutunan sa isang post din sa ibang forum ni boss Xeven2nd na alam ko naman po na marami sa atin ang naka gamit na ng shell nya
umpisahan na po natin
SHELL making - Sample and Guides Tutorial here
Good day mga boss. alam ko po marami ng tutorial here dito about making shell using AutoPlay Media Studio
pero mag-shashare din ako para kahit papano ay makatulong din ako sa inyo ng konti para sa mga mahihilig gumawa ng shell
at para din sa mag-uumpisa pa lang na gusto din gumawa ng shell like GSM shell.
una download po muna kayo ng software parehong cracked or full version po yan mga boss:
i prefered AutoPlay Media Studio v6.0.4.0 pero may mas bago na po dito ito lang ang nakasanayan ko gamitin.
download here:AutoPlay Media Studio v6.0.4.0
after download install nyo lang po ang software at mag-simula na po tayo.
unahin natin ang basic sa pag-gawa ng shell.
PROCEDURE STEP BY STEP:
SAMPLE 1.
- run AutoPlay Media Studio
and click CREATE A NEW PROJECT
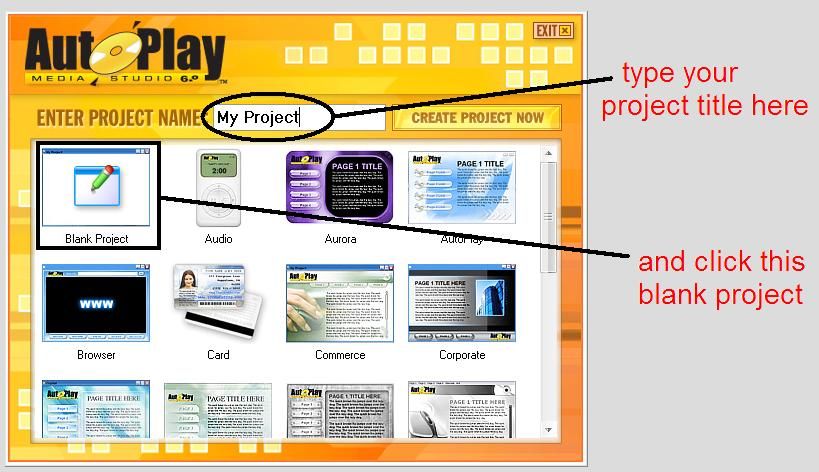
-right click on white background and click PROPERTIES
-choose IMAGE
-click BROWSE (browse wallpaper anything you want in your hard drive)
-click OK
click OK
-right click again on your Back ground wallpaper
-click BUTTON
-choose any button design anything you want
-then click OK
- click the on the BUTTON
- choose QUICK ACTION
- select RUN PROGRAM
- click BROWSE
- and choose software anything you want browse at your hard drive
ex: WIPE_ROM_EASY (see in the picture)
- then click OK
- click BROWSE
- click DOCS
- click OK
click OK
- click PREVIEW to test your project (see in the picture)
- click (CLICK HERE) to test
NOW LETS SAVE THE PROJECT WE MADE
- click BUILD (see in the picture)
NOW YOU CAN FOUND YOUR PROJECT IN DESKTOP (you can save your project also any where you want)
-FINISH
TO BE CONTINUE FOR OTHER SAMPLES AND GUIDES. . . . . . . . . . . . .
isama ko na din po ang multiloader collection ko para sa mga wala pa po Multiloader Collection in 1 Shell
Credit To The Owner Xands Miranda A.K.A Xeven2nd
